ProtoPIC Blog
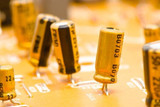
What is a capacitor? How does a capacitor work? What does a capacitor do?
Let’s start by understanding a capacitor. A capacitor works by storing energy electrostatically in an electric field.
What is capacitance?Honestly I’m asking myself that too, so let’s try another way of thinking about it. Let us start out with an analogy: you might know that capacitors are like batteries. In some ways this is a fair analogy, they both store energy, can be charged and discharged. However this is where the similarities end. A battery stores energy in chemical form, charges and re
…
1st Sep 2020
Plant Watering Kit Project
Plant Watering Kit
DISCLAIMER: PLANT POT USED FOR DEMONSTRATION PURPOSES ONLY!
So you've gotten bored of watering your plants? You do it every morning and it puts you back to sleep, or maybe you've forgotten to do it so often that your plant died, or maybe you just love the BBC micro:bit?
Well this
plant watering kit for bbc microbit then lets combine your favourite two hobbies: forgetting to water the plant and the BBC micro:bit and let electronics and a bit of en
…
9th Aug 2020
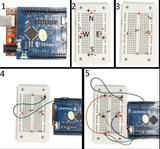
How to Make a Tilt Indicator (Using 1Sheeld+ and an Arduino)
Do you want to get started using the 1Sheeld+? Why not make a simple phone tilt indicator?
The 1Sheeld+ is an arduino shield that connects to your phone via a bluetooth app, allowing your phone's sensors to interact with the arduino hardware. We will be using the accelerometers built into your phone to create a tilt indicator which lights up an LED when you tilt your phone in a particular directionWhat You'll Need
Arduino
1Sheeld+
Breadboard
4 × 3mm red diffuse LEDs
Wire
…
5th Aug 2020
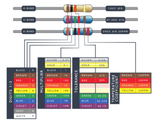
What is a resistor? How does a resistor work? What does a resistor do?
Before we can answer that we need to know:
What is resistance?
Let us start with conductors and insulators. Basically conductors allow electricity to flow and insulators stop electricity. Well that’s a rather simplified view, because there is more to it. For example air is normally an insulator, but with a large enough voltage it becomes a conductor as we see when lightning forms in an electrical storm. So really the air is “resistant” to the flow of electricity and this is how we get to the
…
29th Jul 2020
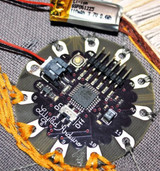
Lilypad Arduino
Lilypad Arduino is changing the way we look at and experience clothing with electronics textiles or e-textiles. You can make dresses that read you poetry or have sensors smuggled inside lace. Or if you like, add projections into your petticoats! What will your first project be?
What are e-textiles?
Put simply, e-textiles are fabrics that have electronics embedded in them. They react like any other circuit, but the components are often design to be easily sewn. The compo
…
25th Nov 2019
Soldering Tutorial
If you want to make anything that involves an Arduino or raspberry pi that is a bit more involved than a flashing LED or media centre, the odds are that you are going to have to solder something to a circuit board.Don’t worry – it’s much simpler than it looks and Proto-PIC have some fantastic soldering kits to get you started!Soldering is a key skill to master if you want to work with electronics. It’s a tricky business too: if you want to attach metal wiring or components to a PCB (printed circ
…
28th Oct 2019
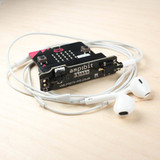
Amp:bit Headphone and Speaker Add On
Tutorial
Description
This short video introduces the amp:bit. This product is the easiest way to hook up a set of headphones or speakers to your BBC micro:bit. Simply plug the micro:bit into the amp:bit and then plug in your headphones! Alternatively, you can solder a PC speaker directly to the provided pads or solder a screw terminal. The amp:bit also features a built-in volume control!
…
5th Sep 2019
Arduino Based Voltage Meter
I was looking at making some videos on Arduino development, and while
planning the recording sessions, I thought about using a web-cam to
show a multi-meter screen to show readings on a circuit. While this
would not be too difficult to arrange, I thought 'What if I could read
the voltage and display it on my PC screen!'. This lead to a mini
project . .
The first step was to read the voltage
using an analog input on the Arduino, and scale th
…
5th Sep 2019
How to Assemble the Temp:bit
First of all, you need to check the content of your kit which is easy as it only contains the PCB and a tmp36 sensor.You will also require the following parts:
Soldering IronSolderFlush cutters or snips
Step 1.Taking the tmp36 as shown, you need to bend the two outer pins as shown below.Taking the tmp36 as shown above you need to bend the two outer pins as shown below.Step 2.Place the tmp36 through the holes as shown below.Now taking the heated soldering solder all 3 pins to the board as shown
…
5th Sep 2019
Day of the Geek Badge
This is a short guide on how to assemble the day of the geek badge.
First up you need to check that you have everything you need:
Included:
Skull PCB 20mm Battery holder LEDs Pin back
Not included:
CR2032 Battery Soldering Iron Solder Pliers Flush cutters
Step 1.
Place
the battery holder into the provided holes and solder to the board,
make sure you get this the correct way around! You need to be able to
insert the battery from the bottom of the
…
5th Sep 2019

