Lilypad Arduino

Lilypad Arduino is changing the way we look at and experience clothing with electronics textiles or e-textiles. You can make dresses that read you poetry or have sensors smuggled inside lace. Or if you like, add projections into your petticoats! What will your first project be?
What are e-textiles?
Put simply, e-textiles are fabrics that have electronics embedded in them. They react like any other circuit, but the components are often design to be easily sewn. The components have blunter corners and a flatter profile to avoid snagging. Most components are washable, but do check to make sure you know which ones.
Conductive thread
The biggest difference between e-textiles and traditional electronics is the use of conductive thread. Conductive thread consists of normal filaments (tiny strands of cloth), each coated with a micron-thick layer of natural silver. It's the silver that carries that current and works the magic!

Before you start with Lilypad Arduino
Sew around each connecting pad at least three times - this will ensure a good connection.
There's no need to sew in resistors. If you look at the tiny Lilypad LED boards, they already have a surface mounted resistor in place, so you don't have to worry.

You will need
Lilypad coin cell battery holder or board
Aida embroidery fabric
Embroidery Floss (for patterns around your circuit - you want it to look good)
A simple circuit
For this simple circuit, we are going to sew together four LEDs in parallel with an ON/OFF switch.
Both of these diagrams show the same circuit. Drawing out your idea beforehand can help you plan what's going where.


Neatly sew together the positive (+) 'wire' (the side indicated by the red floss), making sure to loop around each component's pad at least three times. When you reach the last LED, simply tie a knot and cut the thread. Do the same for the negative (-) wire. As with normal electrical wire, the conductive thread will short-circuit if you allow it to touch itself, so make sure all loose ends are cut short.
What is Lilypad Arduino?
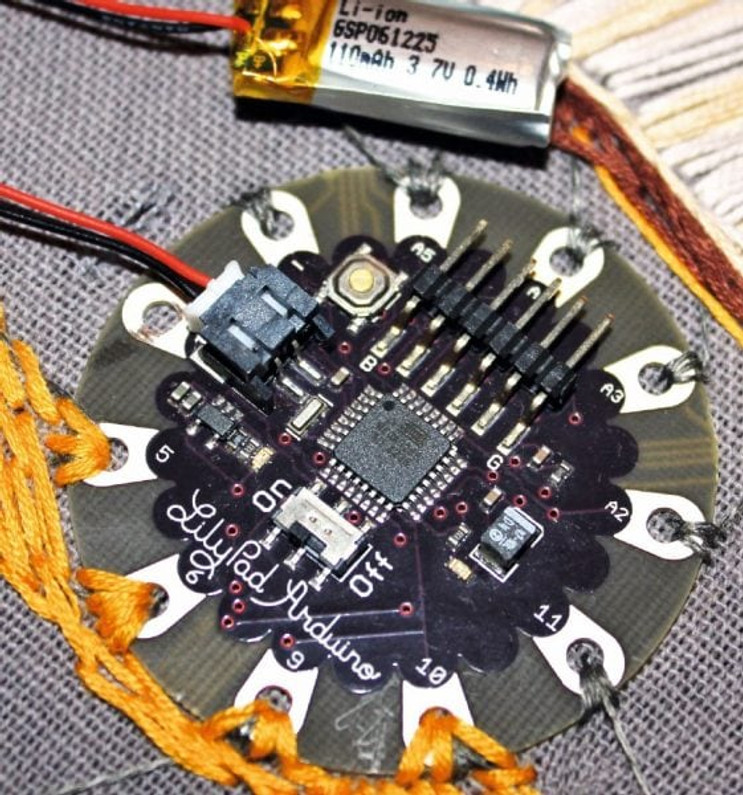
Lilypad Arduino is a wearable programmable system. As with other Arduino models, you can upload sketches to it. You can instruct it to have input and outputs, powering it with a battery or USB. A small lithium battery is perfect for the Lilypad Arduino Simple Board. It has a JST socket (a type of DC connector) so it's easy to remove and charge.
Note: Do not use more than 5.5V or you'll end up frying your Arduino!
Warning: Unplug the battery before washing and hand wash in cold water with a gentle detergent. Do not dry clean.
How do you upload a sketch for Lilypad Arduino?
Arduino software is available free from this link. Once that is installed, upload your sketch to your Lilypad Arduino by using an FTDI USB adapter. Now you have your fabric sampler all ready. You can now play! Code, adapt and let your imagination run wild!


Take this to the next level!
Why not try a more complicated circuit? This project uses a light sensor to change the colour of an RGB (red / green / blue) LED and flash a set of white LEDs in parallel. The opportunities are endless.
You could light up the dancefloor in a charged circle skirt, send messages via your tanktop or explore a city with a sensor-triggered guide sewn into your shoes.
Conduct your own experiments in style! Proto-PIC are a UK Distributor for Sparkfun Lilypad and we can source all the components you need. If you don't see what you need on our site, we can order and ship very quickly, so do contact us and let us know what you need.
Recent Posts
-
What is Ohm's Law?
Are you curious about how electricity works? Let me introduce you to a very important concept i …9th Mar 2023 -
How do I control a central heating system using an Arduino
To control a heating system using an Arduino, you will need to write a sketch (program) that impleme …7th Feb 2023 -
The Versatility of Slotted Aluminium Extrusions: From Robotics to Camper Van Renovations
In today's ever-evolving world, the need for versatile and adaptable building materials is greater t …25th Jan 2023


