Using Visual Studio Code with Raspberry Pi Pico:
Getting Started with Pi Pico

This month the Raspberry Pi Pico got released, and we're mighty excited. Could this be the best means of low cost micro control available?? The Pi foundation have released their own brand of silicon and this device is known as the RP2040. There are boards in the pipeline from both Adafruit and Sparkfun, but for now, lets get started with the Pico from Raspberry Pi!
Well call us curious, but the first thing we did is plug it into a PC running Windows 10, and up popped a USB Drive (FAT) with approx 127Mb of storage! But what now? Well the Raspberry Pi Pico is programmed using either C/C++ or MicroPython and adding a program to Pico is as easy as dragging and dropping a file while Raspberry Pi Pico is in boot mode.

Install ARM GCC Compiler
We’re really looking forward to Arduino support being made available for the Pico. In the meantime, we recommend Visual Studio Code, and then to watch a few of the video tutorials that Microsoft put together!
You’ll also want to download a few other softwarings (we’re assuming that you don’t already have them installed, if so, please skip the ones you already have):
Firstly the Arm GCC Compiler. During the install process and before selecting [Finish], select the [Add path to environment variable] radio button.
Install CMake

Next download and install the latest version of CMake ensuring to remove any previous version. During the install be sure to select [Add CMake to the system PATH for all users] radio button.
CMake is an open-source system that manages the build process in an operating system and is designed to be used in conjunction with the native build environment.
Installing the required build tools for Visual Studio
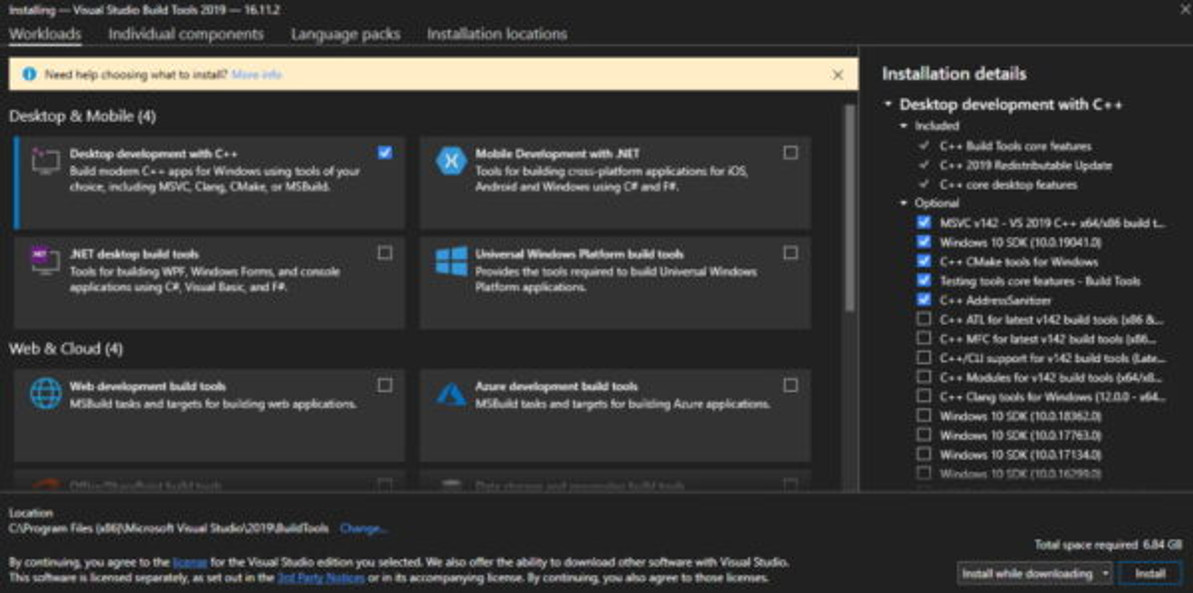
Now download the C/C++ components and build tools for Visual Studio. You’ll find these at the bottom of the list under the heading [Tools for Visual Studio 2019]. Hit the link and your download should start immediately. Then install the file. During install select [Desktop development with C++] and [Install].

Depending on the speed of your network this could take a while as the package is more than 6.5Gb! Patience is king here…. Thank goodness for coffee.

Once the build tools have been installed, your Windows machine will need a reboot to complete the installation.

Installing Python 3
Now you’ll need to install Python 3. Just grab the latest version if you don’t already have it installed. Be sure to check the [Add Python 3.x to PATH] radio button. Then Install!
We’re almost there!
Install Git!

Install Git and you’ll be ready for coding
Recent Posts
-
What is Ohm's Law?
Are you curious about how electricity works? Let me introduce you to a very important concept i …9th Mar 2023 -
How do I control a central heating system using an Arduino
To control a heating system using an Arduino, you will need to write a sketch (program) that impleme …7th Feb 2023 -
The Versatility of Slotted Aluminium Extrusions: From Robotics to Camper Van Renovations
In today's ever-evolving world, the need for versatile and adaptable building materials is greater t …25th Jan 2023


